> For the complete documentation index, see [llms.txt](https://docs.jediswap.xyz/llms.txt). Markdown versions of documentation pages are available by appending `.md` to page URLs; this page is available as [Markdown](https://docs.jediswap.xyz/how-to-use-jediswap/how-to-make-a-swap.md).
# How to make a swap
In JediSwap, users can swap tokens permissionlessly without losing custody of their funds.
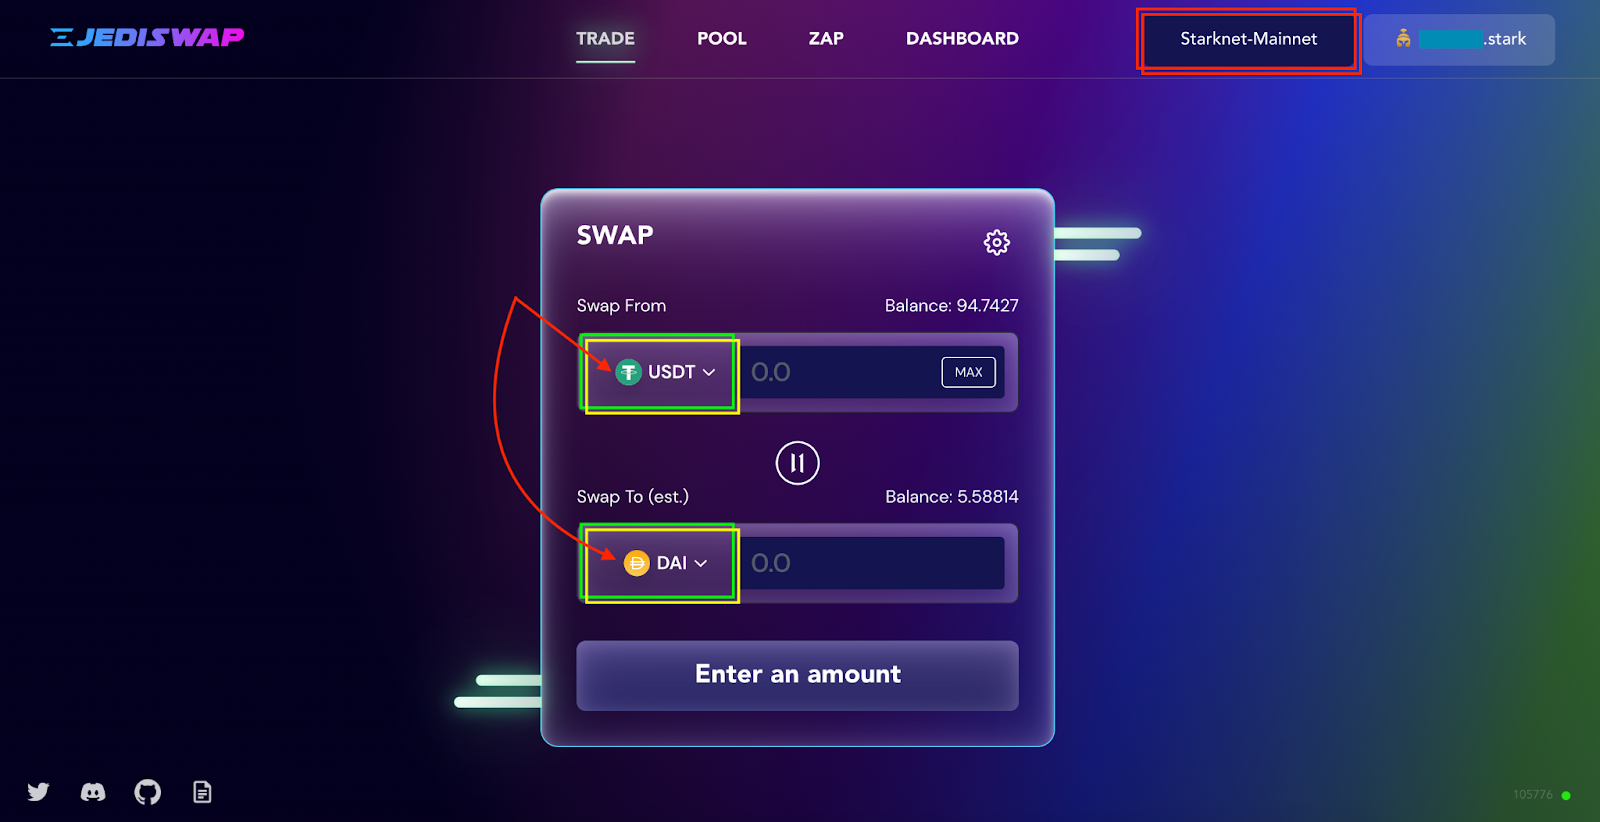
## 1. Choose the tokens you wish to swap
* Go to
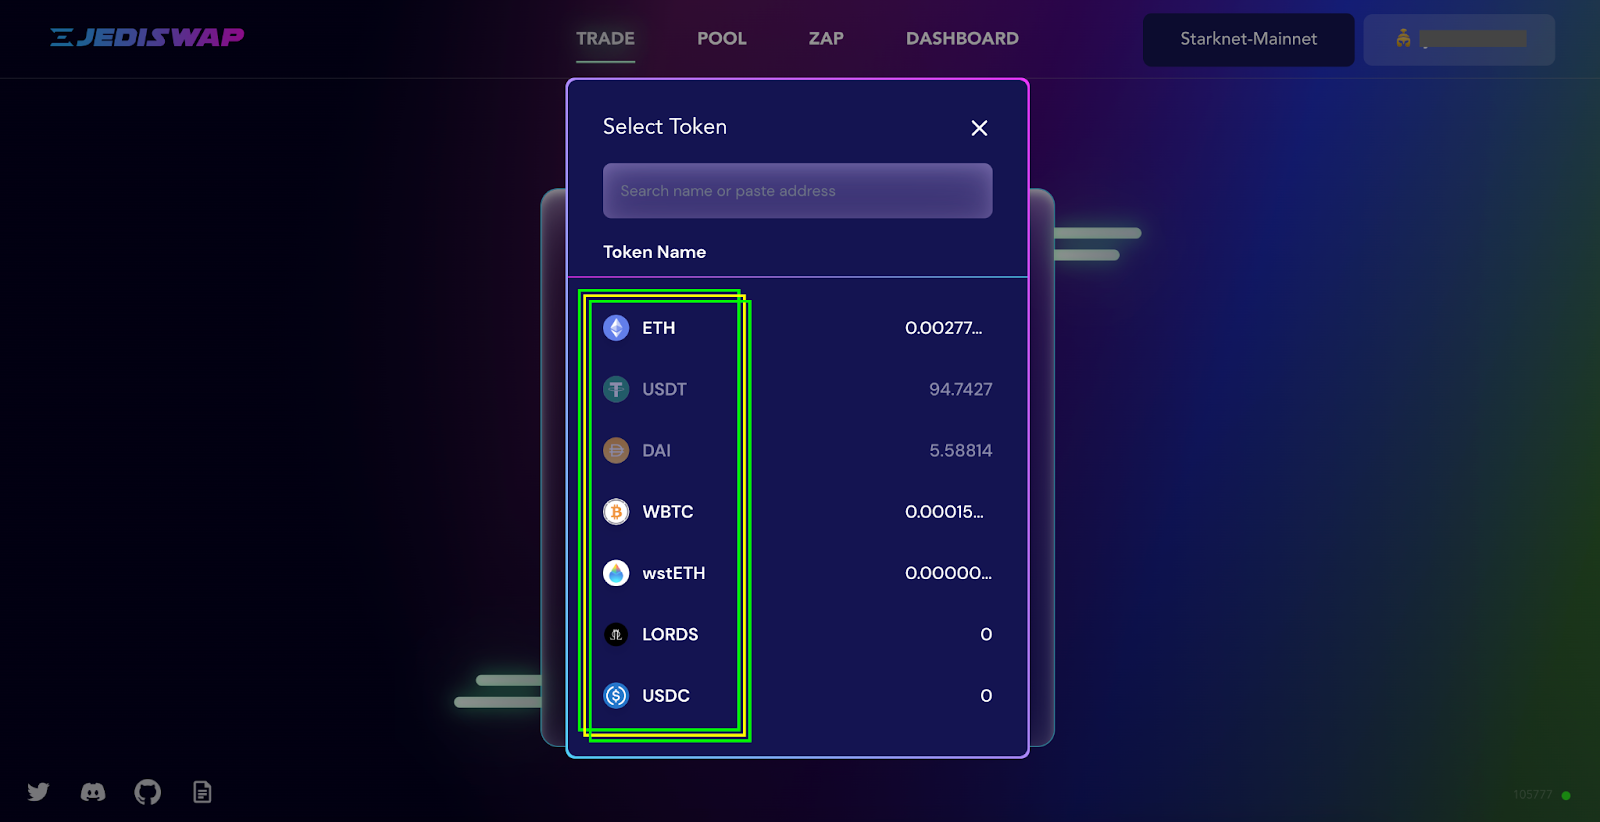
* Choose the token you wish to swap and the token you wish to receive.
You can also search a token by its name or contract address.
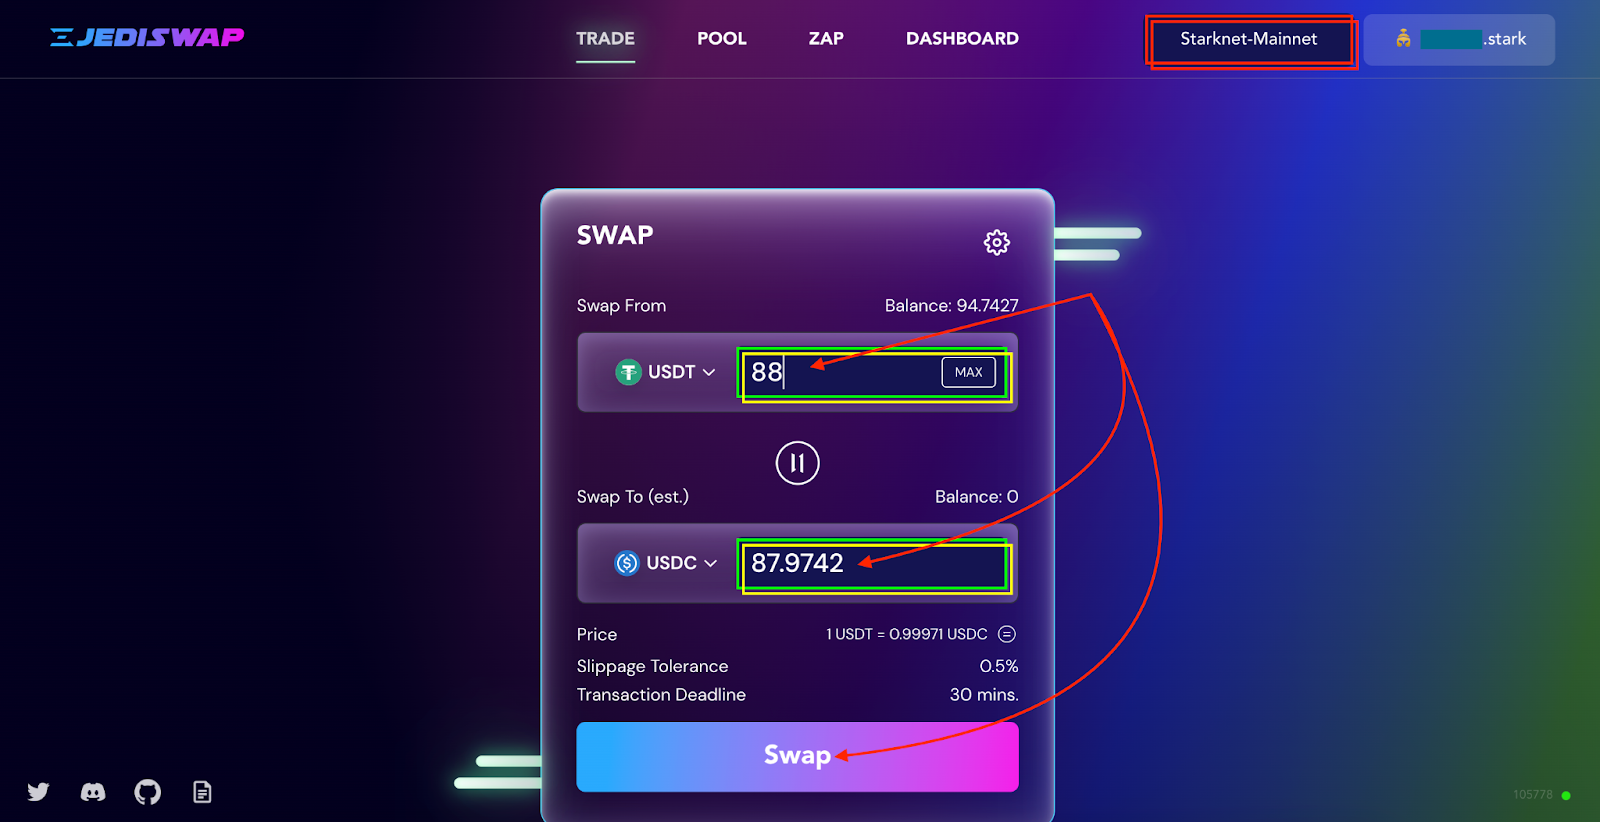
## 2. Enter the input or output amount
* Enter the amount that you wish to swap. Fill in either the input amount for the token you want to trade or the output amount for the token you want to receive.
## 3. Review your swap
* Click on the 'Swap' button to see a preview of your swap.
This screen will show you all the details of your swap, like the swap fee, price impact, allowed slippage, etc.
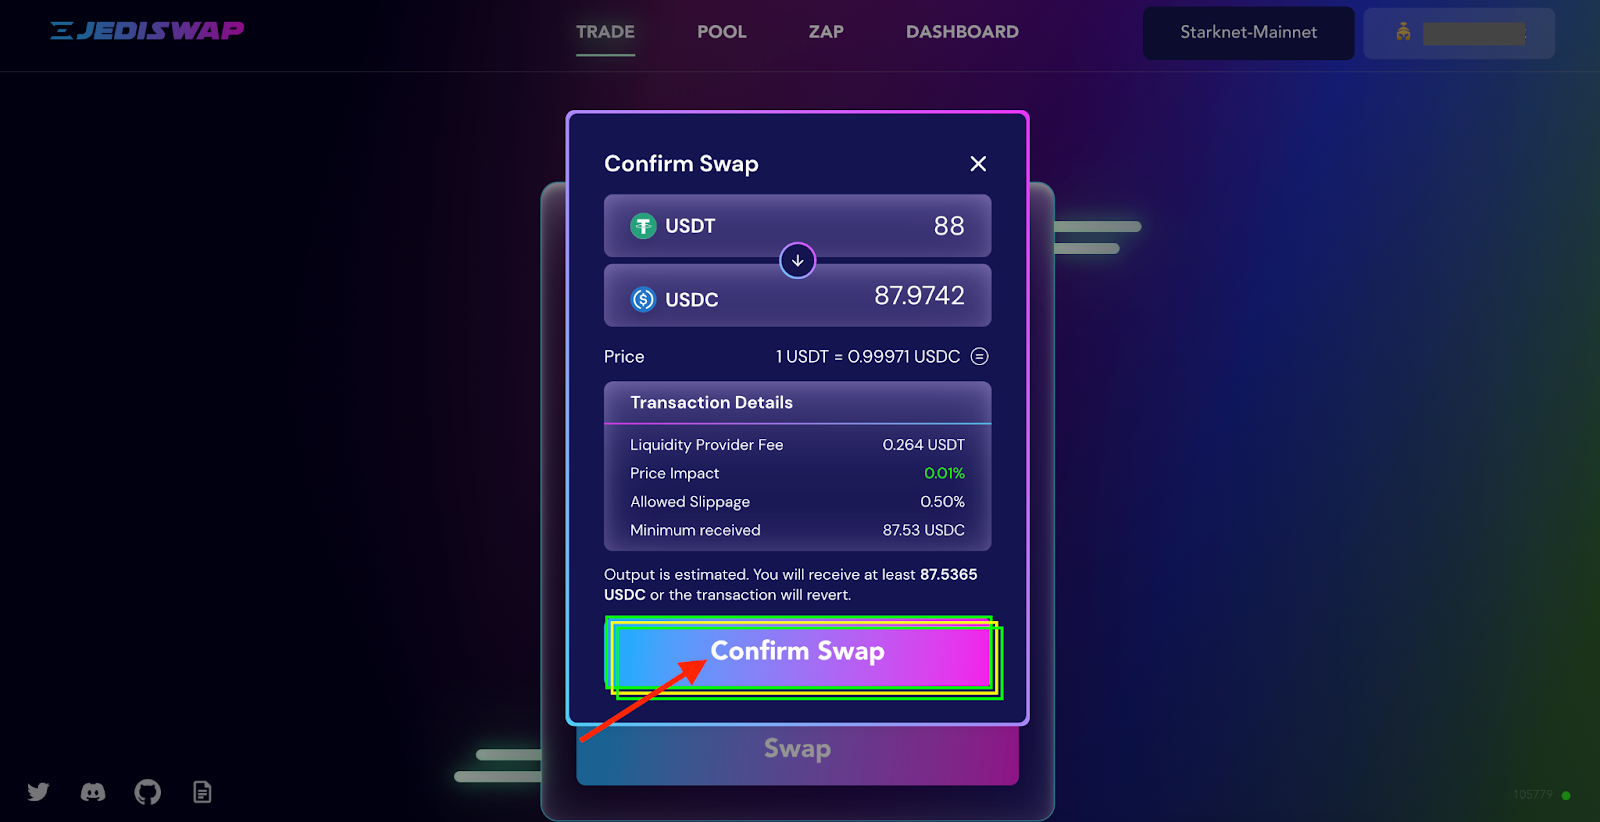
## 4. Confirm your swap
* Once you have reviewed your swap details, click on the “Confirm Swap” button, and it will open an Argent-X popup to authorize the transaction
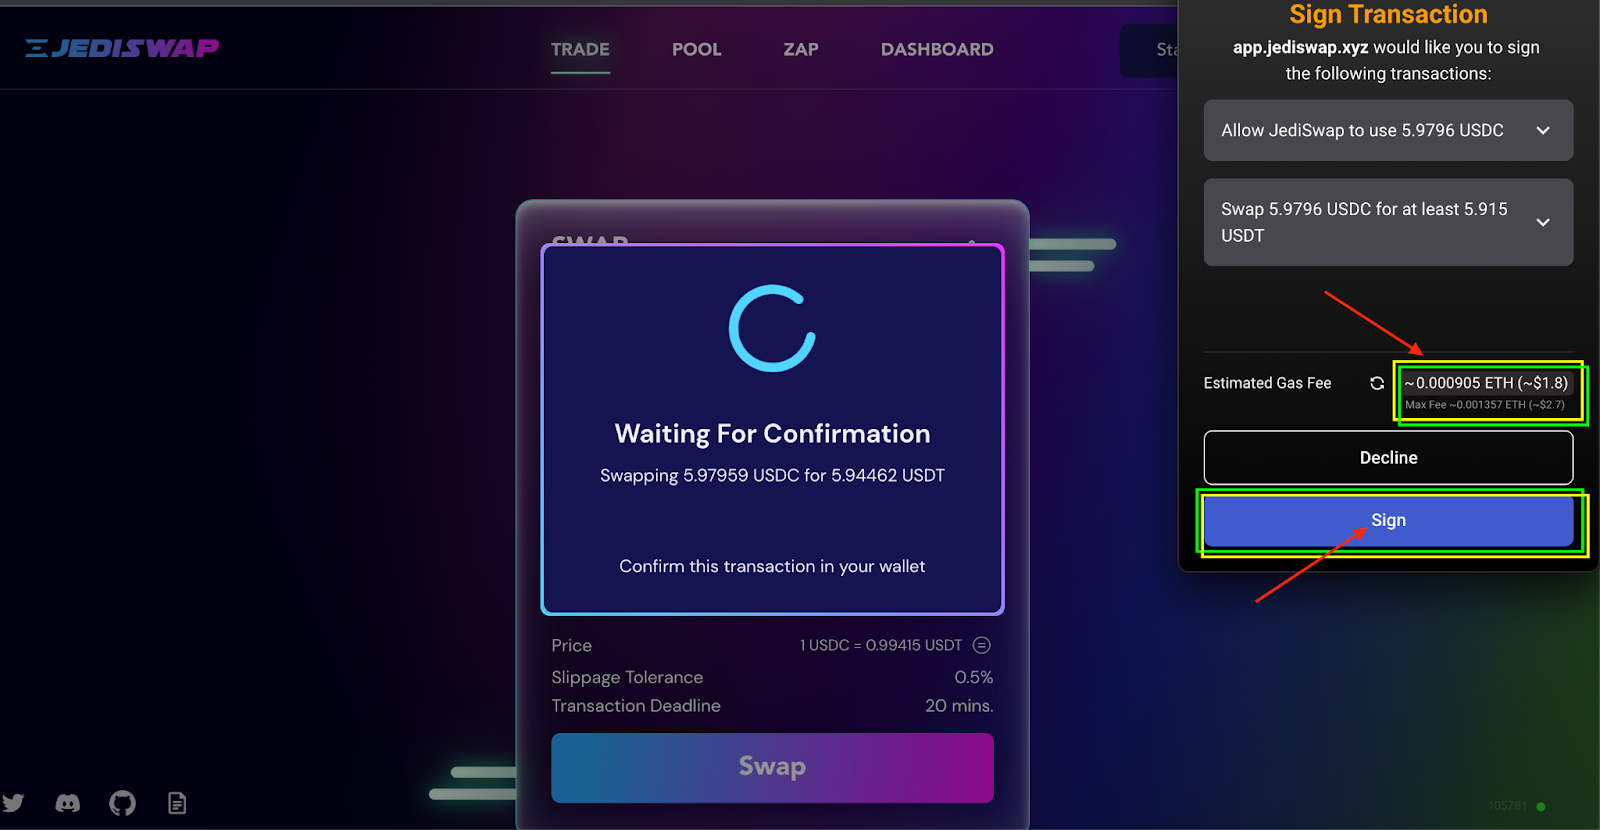
## 5. Sign the swap transaction
* Argent-X will prompt you to sign the swap transaction. Click on "Sign" to complete the transaction.
## 6. Wait for the transaction to be confirmed
This should take a couple of seconds.
[*How to add Liquidity on JediSwap*](https://docs.jediswap.xyz/how-to-use-jediswap/how-to-add-liquidity)